to OpenWRT")
Convert Xiaomi 4A (100m) to OpenWRT
27 July 2022Today, the objective is to guide you to deploy OpenWRT on a Xiaomi 4A(100m) router. OpenWRT is essential if you need to set up an independent wifi network for demonstration / DIY projects.
I chose this router (Xiaomi 4A) because it is of high quality, cheap, and has a good OpenWRT community behind it.

For the subsequent part, I used a windows PC.
Part 0:
Software requirements
- MIWFIRepairTool (available : https://bigota.miwifi.com/xiaoqiang/tools/MIWIFIRepairTool.x86.zip )
- MIWFIRepairTool firmware- this allows you to use the exploit (available: bigota.miwifi.com/xiaoqiang/rom/r4ac/miwifi_r4ac_all_c4b35_2.18.28.bin)
- OpenWRT firmware- (available: https://downloads.openwrt.org/releases/21.02.1/targets/ramips/mt76x8/openwrt-21.02.1-ramips-mt76x8-xiaomi_mi-router-4a-100m-squashfs-sysupgrade.bin)
- The filezila FTP software
All files are archived at the end of the article as usual
Hardware requirements:
- A raspberry with VNC
- 3 Ethernet cables
Setting up the router to exploit the loophole that allows the installation of OpenWRT
The goal here is to downgrade the firmware of the router to an older version, which would condition the router for the OpenWRTInvasion exploit.
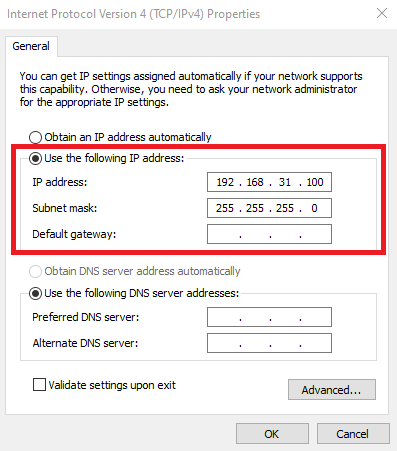
To do this, first configure the Ethernet port of your laptop to a static IP address as shown in the image below:
Then connect one of the Ethernet cables between your PC and the route.
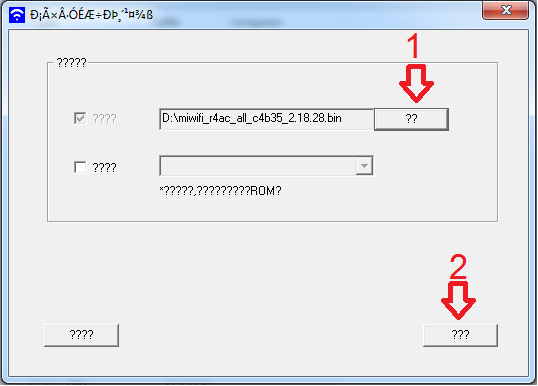
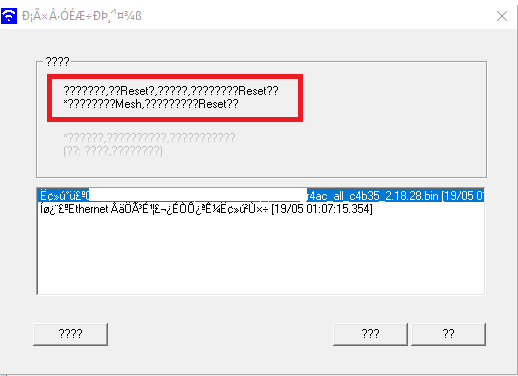
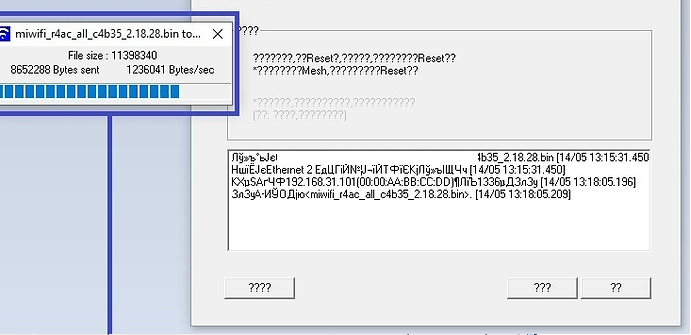
Launch the MIWIFIRepairTool program and Choose the file miwifi_r4ac_all_c4b35_2.18.28.bin (using the button”??”(1)) and click on the “???” (2) to proceed (see image below).
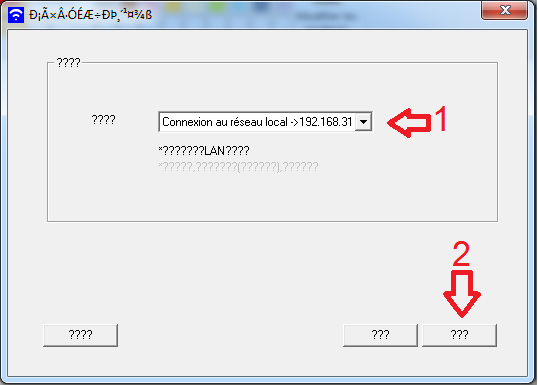
Now choose the previously configured connection (1) and click on “???” (2) to proceed
The program should now be waiting to establish communication with the router (see image below).
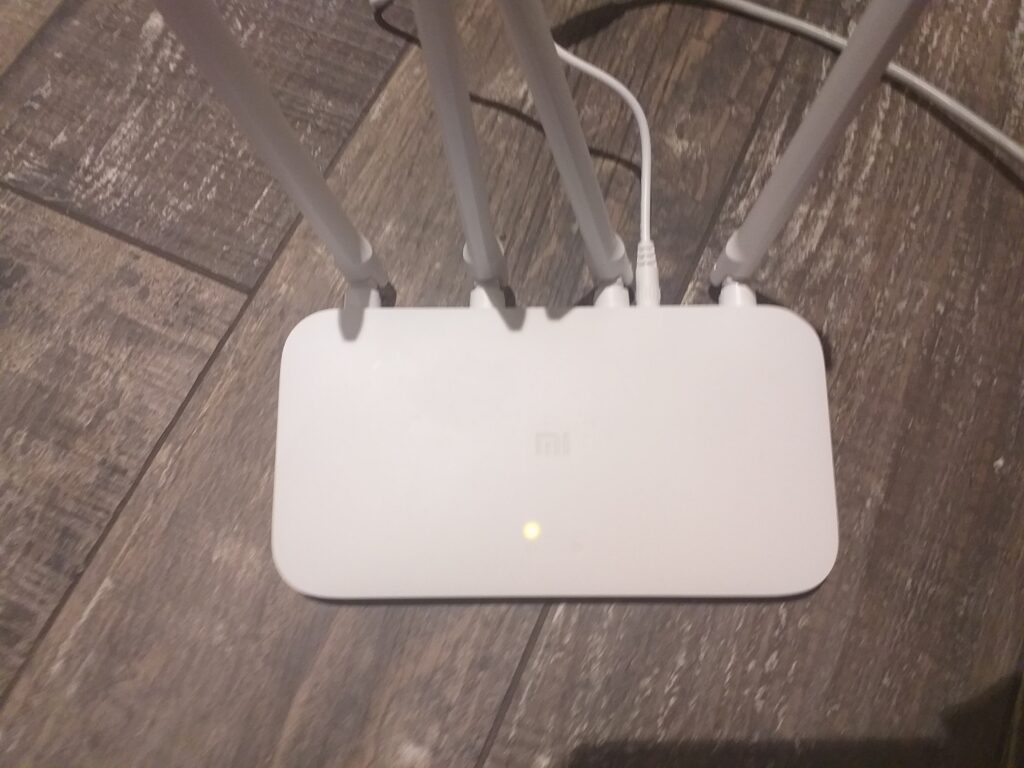
While holding the reset button, power up your router. Release the reset button when the amber light starts flashing (after about 8 seconds) and wait for the router to flash the old firmware.
The LED indicator on the router should flash orange
Wait for the LED indicator to start flashing with a blue color. This process takes a bit of time ( five mins easily), remember to keep all devices powered and do not reset the router.
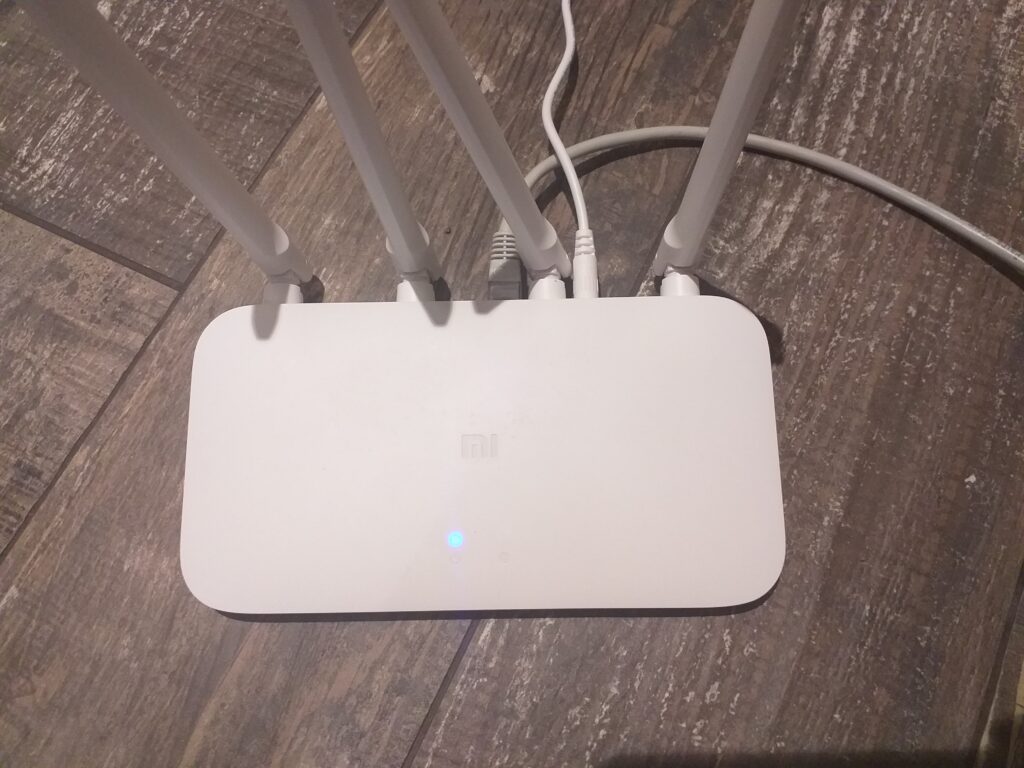
Once the LED indicator has turned from orange to blue (flashing), reset the router by unplugging and plugging the router back in. Wait for the LED to turn solid blue. Now you should see the Wi-Fi signal of the router on your (see image below)

Congratulations, you have successfully completed the first step. You can now unplug your Ethernet cable and restore your PC’s network settings to a dynamic IP.
Part 2: Primary and Provisional Router Configuration
Now, I used the indications marked here and I will detail them below, systematically.
To start, you must connect the Wi-Fi router to your internet box (ADSL Modem, etc) on the port marked internet (the blue on the right next to the reset button).
On my PC, I configured my router with the following method:
Note: For information and convenience, because I do not speak Chinese, the password I use is always the same and ideally 13 characters: “PasswordCool”
Step 1. Connect to the Xiaomi network seen previously (by Wi-Fi). It should automatically redirect you to the web page (router admin page) shown in the image below.

You have to click on the blue button

Step 2 On this page, enter your password (remember for all the work here I used “PasswordCool”
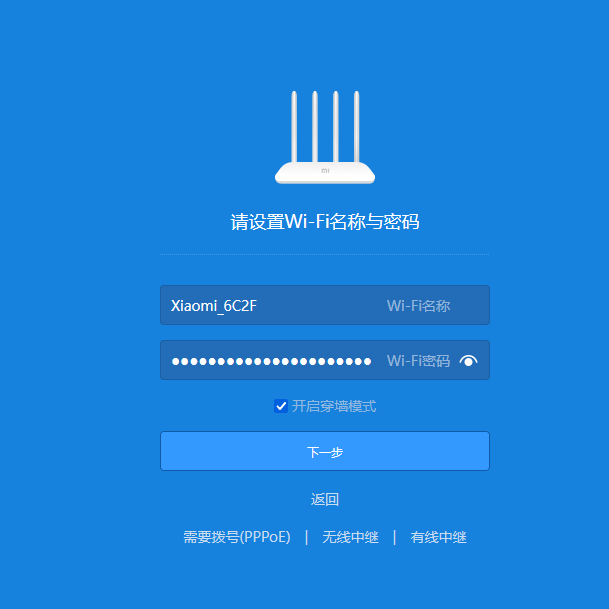
and click on the button

Step 3. Enter your chosen password again (admin password – for me it is “PasswordCool”)
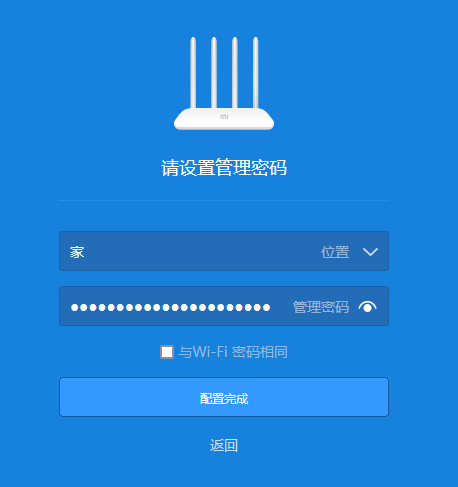
and click on the button.

Step 4. You should now have a progress bar appearing (wait until it’s done loading)
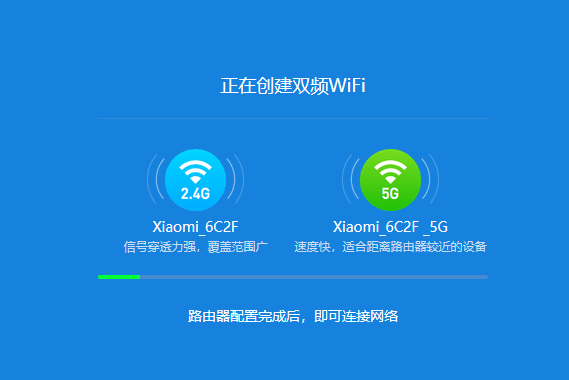
Step 5 – A new page should have loaded (see image below)

Select the button indicated in the image below (this should open a Xiaomi advert, you can close this and proceed).

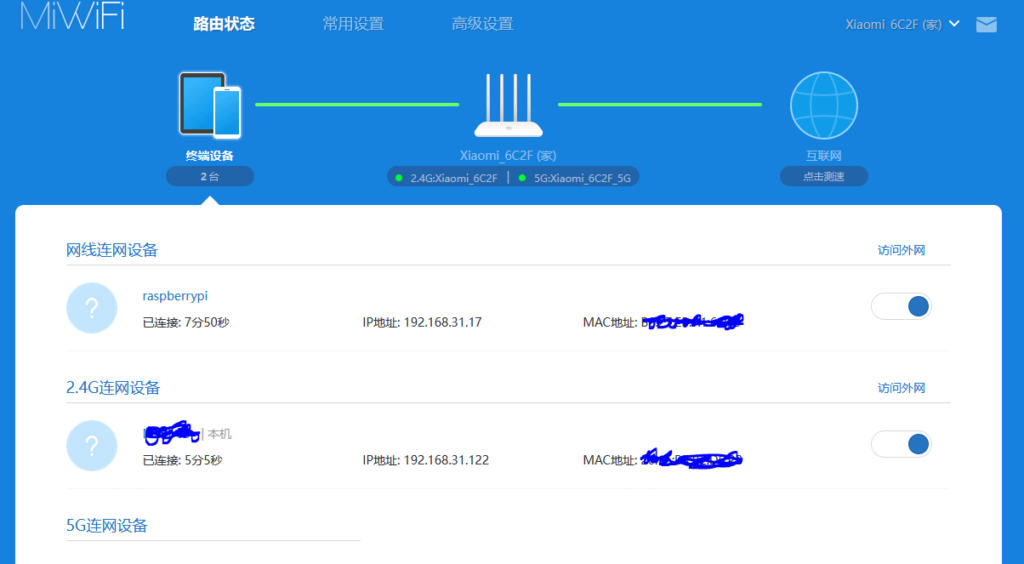
At this point, the configuration is done, and your PC should have disconnected from the WI-FI (you change the password remember). Connect to the WI-FI again and this time enter your chosen password ( “PasswordCool” for me).
Part 3: Using the exploit
To now utilize the exploit, first connect an Ethernet cable between my internet box and my Wi-Fi router because we will need an internet connection to launch the exploit (you did this already but in case you disconnected the cable, you need to then reconnect them).
Note: Personally, from this point, I prefer to use a raspberry pi with open VNC access because it was easier from my point of view. Normally the method works with PC or other but I have not tested these approaches and cannot vouch for them.
Connect the raspberry pi to the Xiaomi router via Ethernet cable. You can use any of the available ports on the router. Once this is done, on my main PC, reconnect to the Xiaomi’s Wi-Fi network, and in your browser, type the address 192.168.31.1. This brings up the router admin page where you will be asked for the admin password (in this case “PasswordCool” )
[

It should bring up the following page:

Click on the icon below (you can’t miss it, it’s at the top of the screen)

You should now see the IP address of your raspberry pi.
Now that we have the IP address of the Raspberry Pi, open VNC viewer, and fill in the IP address as shown below:

Enter your login details (username and password).
Now open a terminal on the Raspberry Pi (via VNC) and type the following command:
sudo git clone https://github.com/acecilia/OpenWRTInvasion.git
cd OpenWRTInvasion/
Then start the installation of the requirements with the following command
pip3 install -r requirements.txt # Install requirements.
The next script might ask you for a token (maybe because from the last update, only the address and password were required but do not panic). If you need the token, still on your raspberry, open your browser and enter the IP address 192.168.31.1. Enter your password and retrieve the token (here it is a61……50).

Now that you have this token, you can run the following command:
python3 remote_command_execution_vulnerability.py # Run the scriptEnter the address 192.168.31.1 when the script asks you

Then fill in the admin password of your Xiaomi (“PasswordCool”)

Choose 1 and hit enter

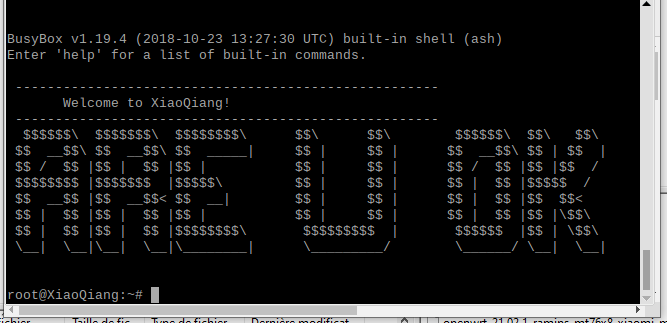
wait a few moments (until you see the screen below)
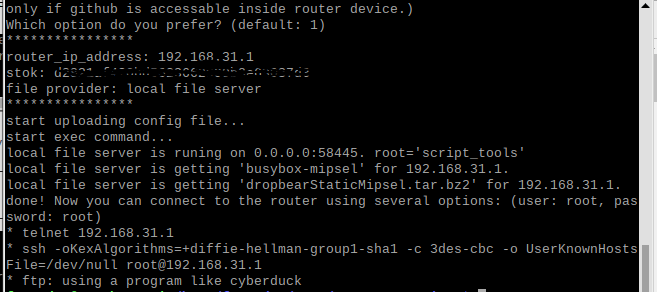
Congratulations, the exploit is now in place. We will be able to switch to flashing the OpenWRT firmware
Part 4: Flashing OpenWRT Firmware
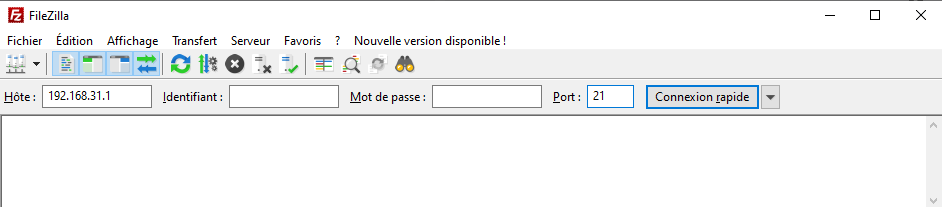
open FileZilla software and enter the following parameters and connect:
IP address 192.168.31.1
User name: root
Password: root
Port: 21
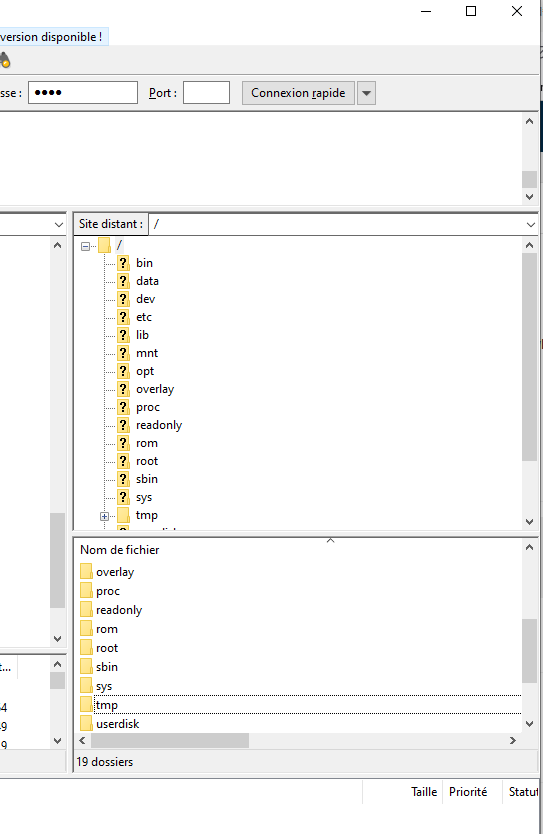
Once the connection is established, navigate to the “tmp” folder and drag and drop the file “openwrt-21.02.1-ramips-mt76x8-xiaomi_mi-router-4a-100m-squashfs-sysupgrade.bin”
Now in the VNC terminal of the Raspberry Pi, type the command
telnet 192.168.31.1

Enter the login/password: root/root

You should have the following display
Type the commands:
cd /tmp
mtd -r write openwrt-21.02.1-ramips-mt76x8-xiaomi_mi-router-4a-100m-squashfs-sysupgrade.bin OS1

Wait for the firmware to finish flashing then the router will reboot

Wait about 5 minutes then turn off the power and unplug all cables.
You don’t need the raspberry pi anymore,( you can thank it because it did a wonderful job).
Now restart the router and the LED should flash orange and then turn blue.
Connect an RJ45 (Ethernet) cable between an Ethernet output of the router (not the blue port) and your PC.
Then in your browser, type the IP address 192.168.1.1
The OpenWRT login page should load and be displayed as below.
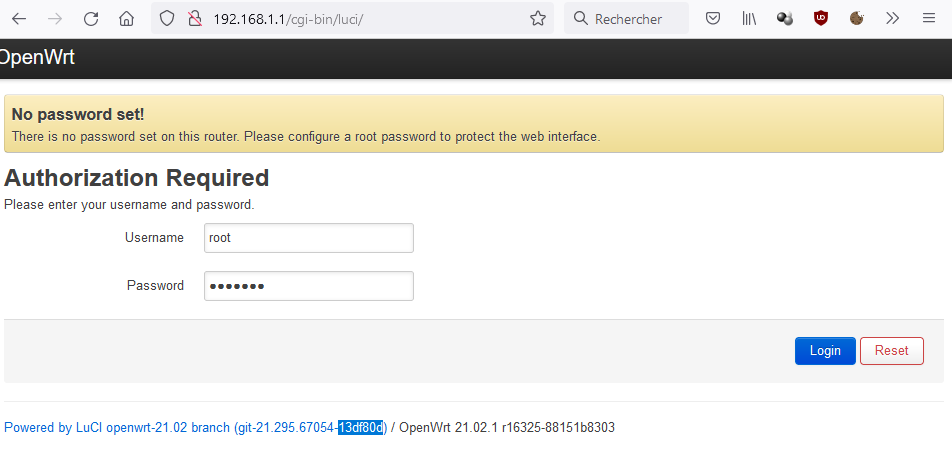
Delete the present password and click on Login (yes no password required)
A new page should load as displayed below.
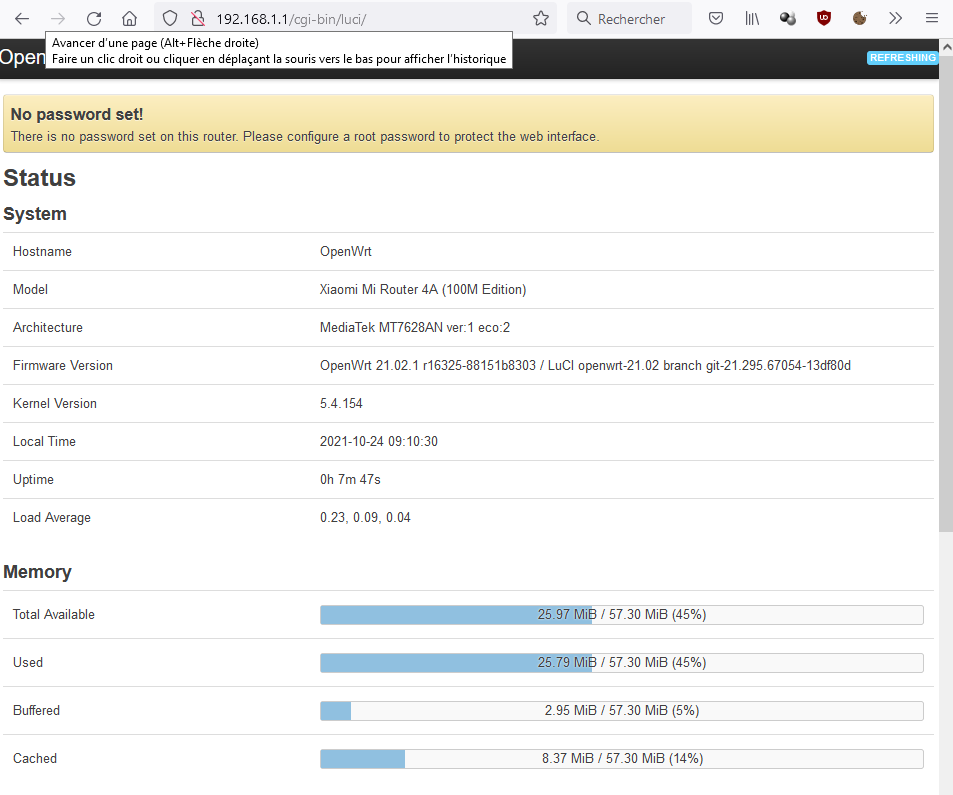
Congratulations, you are now the proud owner of a Xiaomi router under OpenWRT!!!!! However, remember to put in a new password!
Part 5: (Bonus) turn on wifi
By default, the Wi-Fi is deactivated on OpenWRT. What then is the fun in having a Wi-Fi router without Wi-Fi services (this is no fun at all).
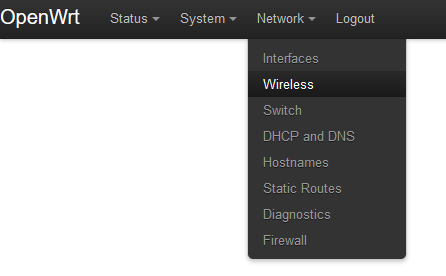
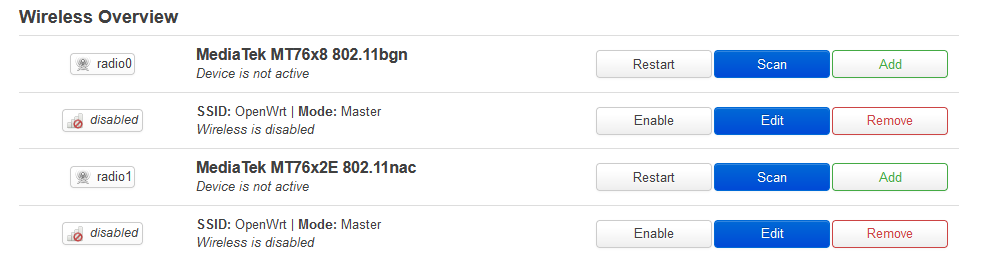
To enable the WI-FI, click on Network > Wireless
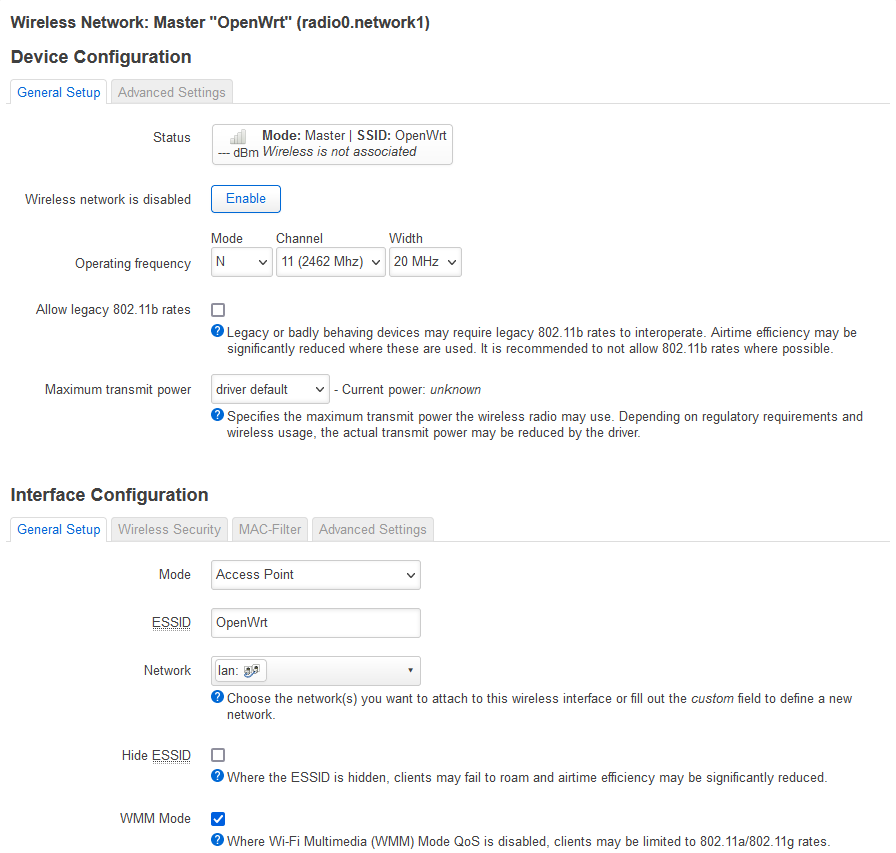
Then edit the first instance of “SSID: OpenWrt” and fill in the required information
In my example, I am only illustrating a setup with basic functionality, as I am not a networking expert (you can have fun with the setting as long as you know what you are doing).
Now, in the General Setup tab at the bottom, put the ESSID you want
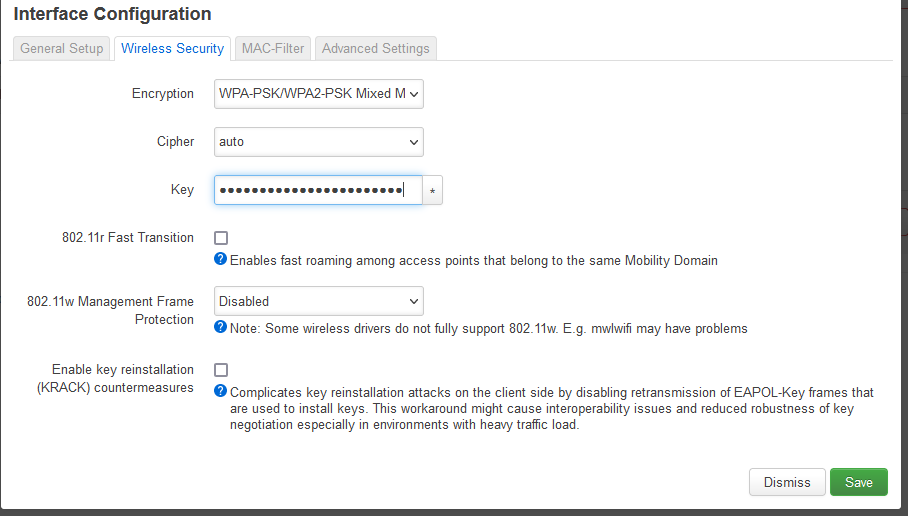
In the Wireless Security tab, choose your Encryption mode and your password that suits you and click on Save
[i
Now click Enable

OpenWrt will consider the new parameters and apply them

Once this is applied, do the same with the 2nd AC subnet (for mine, I added 5G data at the end, to differentiate the 2 frequencies) and click on Save and Enable

At the end, you should have it (more or less) setup as displayed in the image below, This indicates your setup is ok and good to go.

Now if you look at your Wi-Fi networks accessible from your pc…..
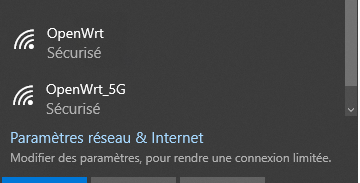
Therefore, here is a working OpenWRT router with Wi-Fi!
You can now reconnect the internet cable from your box to your Xiaomi OpenWRT router (the blue port) and take advantage of your brand new network for all your IoT projects in complete safety
As promised, below are the source files:
The programs
Program-Files-Article-Xiaomi Download
A copy of Git just in case
OpenWRTInvasion-master_2Download
As usual, here are the references that helped me.
That’s all for now!
I hope this will help you,
Jerome Ferrari